


How to Clean Sterling Silver Jewellery at Home
How to Clean Sterling Silver Jewellery at Home
The complete care guide — three methods for every level of tarnish
To clean sterling silver at home: wipe with a silver polishing cloth for light dullness, soak in warm soapy water for moderate tarnish, or use an aluminium foil and baking soda bath for heavy tarnish. Never use toothpaste, bleach, or rubber bands near silver — these cause irreversible damage.
- Why sterling silver tarnishes
- The three-tier cleaning system
- Method 1 — Silver polishing cloth
- Method 2 — Warm water and mild soap
- Method 3 — Baking soda and foil bath
- What to use — and what to never use
- Cleaning gemstone-set silver
- How often to clean
- How to prevent tarnish
- When to see a jeweller
- Frequently asked questions
Sterling silver is a living metal. Unlike plastic or steel, it reacts quietly to air, skin, and everything it touches. That grey film creeping over your favourite ring is not damage. It is not a sign of poor quality. It is tarnish — it is completely normal — and it lifts away in minutes once you know how. This is the complete guide to cleaning your 925 sterling silver at home, from first principles to the specific step-by-step methods our studio uses every day.
Why Does Sterling Silver Tarnish?
Before you clean anything, it helps to understand what you are actually cleaning off. Tarnish is not dirt. It is a chemical reaction — the silver in your jewellery responding to sulphur compounds naturally present in air, moisture, and everyday products like perfume, lotion, and hairspray.
The result is a thin surface layer of silver sulphide (Ag₂S): first a warm yellow, deepening to brown, eventually the charcoal-grey we all recognise. Humidity, certain foods (especially eggs and onions), rubber, and chlorinated water all accelerate this process considerably.

The most important thing to understand: tarnish sits on the surface of the metal only. It has not eaten into your jewellery. It has not weakened it. Every cleaning method below works by lifting or chemically reversing that surface layer — which is why even a heavily tarnished piece sitting in a drawer for years can return to a full bright shine in under ten minutes.
This is only possible because of what 925 sterling silver actually is — solid precious metal all the way through. Silver-plated jewellery cannot be cleaned the same way: aggressive polishing strips through the plating to the base metal beneath. With genuine solid sterling, you are polishing the same metal every time, no matter how many times you clean it.
Tarnish is silver sulphide — a surface reaction, not structural damage. The bright silver you bought is still there, waiting. Every method in this guide works by lifting or reversing that surface layer.
— AG925 StudioThe Three-Tier Cleaning System
The most common mistake in silver care is reaching for a heavy-duty method when a gentle one would do — and in doing so, over-cleaning, using the wrong products on the wrong pieces, or creating unnecessary wear. Match the effort to the tarnish level and you will never make that mistake.
Here is the framework we use in the AG925 studio:
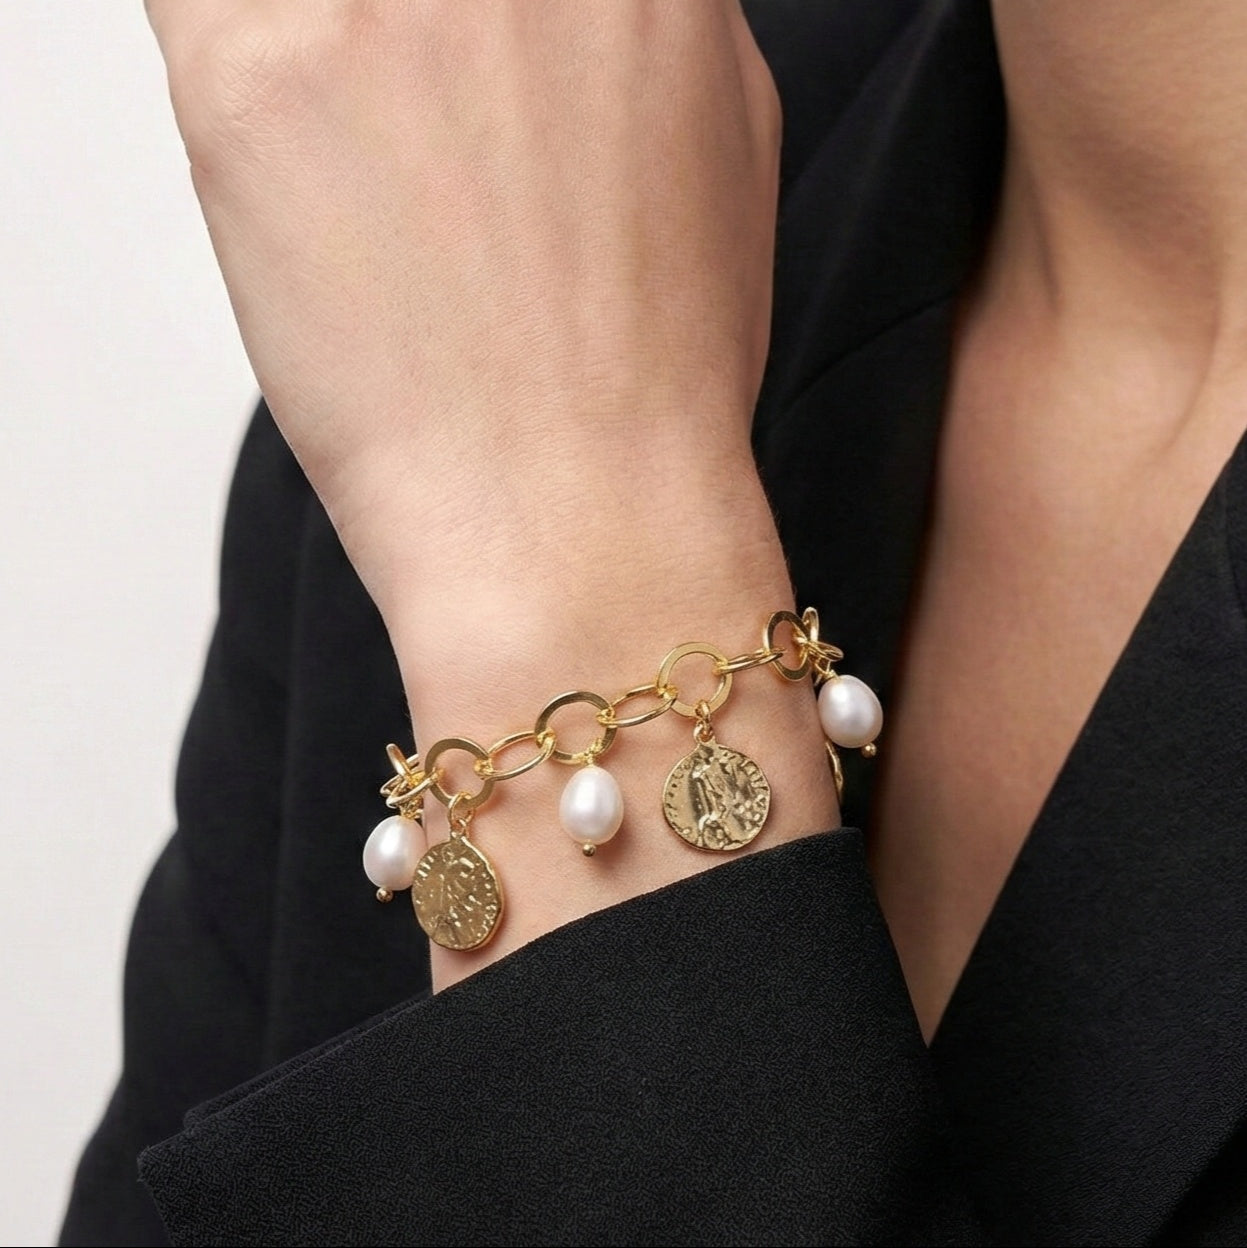
For light, everyday dullness — a silver polishing cloth. A soft cotton cloth impregnated with a mild polishing compound handles the faint loss of shine that builds over a week in under a minute. It is safe on all solid sterling silver, including stone-set pieces, and is the one tool worth keeping within reach. Best for weekly, daily-wear care.
For moderate tarnish — warm water and mild soap. Warm water, one drop of mild dish soap, and a soft brush make up the most versatile method in this guide. It is safe for most gemstone pieces and reaches the tarnish and body oils that build up inside chain links, engravings, and settings a cloth cannot. Ideal as a monthly clean.
For heavy tarnish — the aluminium foil and baking soda bath. A genuine electrochemical reaction converts the silver sulphide back into silver, transferring it from your jewellery onto the foil. It is highly effective for pieces that have gone very dark — but for plain silver only, never for pieces set with stones or finished with intentional oxidised detailing.
Method 1 — The Silver Polishing Cloth
For everyday wear and the faint loss of shine that builds over a week or two, a dedicated silver polishing cloth is the best tool you can own. It is safe on all solid sterling silver — including stone-set pieces — takes under a minute, and a single cloth lasts months of regular use. It is the tool AG925 recommends keeping on your dressing table, wherever you put jewellery on and take it off.

What makes a silver polishing cloth different from an ordinary cloth? A real silver polishing cloth is cotton fabric impregnated with a mild polishing compound — usually a blend of jeweller's rouge or a similar fine abrasive at a concentration low enough not to scratch silver. It is not just a soft cloth. A microfibre cloth or cotton T-shirt will buff away some surface grime, but it will not lift tarnish the way a treated cloth does.
Step-by-Step: Polishing Cloth Method
-
Use Long, Straight Strokes — Not Circles Buff along the length of the piece. Circular motion can leave a swirled pattern on flat, bright silver surfaces, particularly visible on wider band rings and smooth pendants.
-
Work Into Details with a Cloth Corner Fold the cloth to a point and press gently into joins, channel settings, and chain links where tarnish collects first. The grey residue the cloth picks up is the tarnish itself — this is the process working.
-
Never Wash the Cloth The grey marks on a used cloth are not dirt — they are the record of every tarnish removal. Washing strips the polishing compound and renders the cloth largely ineffective. Replace it when the entire cloth is deeply saturated, typically after many months of use.
Keep a polishing cloth next to your jewellery storage. A thirty-second buff before you put a piece away does more for long-term brightness than any periodic deep clean — because you are removing the day's tarnish-forming residues before they have time to react with the metal.
Method 2 — Warm Water
& Mild Dish Soap
This is the workhorse method — the one to reach for monthly, or whenever a cloth alone is not getting into the texture and detail of a piece. It is gentle enough for most stone-set jewellery, effective for moderate tarnish, and you almost certainly have everything you need already.

The key word is mild. Use a phosphate-free, fragrance-free dish soap — something gentle enough to wash baby bottles, not something formulated to cut through heavy grease. Avoid anything with bleach, ammonia, or strong degreasers in the formula.
Step-by-Step: Warm Soap Method
-
Mix: One Drop of Mild Soap in Warm Water Use warm water — not hot. Heat can cause thermal shock in some stones, loosening their settings or causing fractures in inclusion-prone gems like emerald. One drop of soap is enough — you want a faint soapy solution, not suds.
-
Soak for Five to Ten Minutes Submerge the piece. Soaking loosens the build-up of body oils, moisturiser, and surface grime that accumulates inside settings, engraving, and the links of chains — the areas a cloth never reaches.
-
Brush Gently with a Soft Brush A baby toothbrush or a dedicated jewellery brush works best. Pay particular attention to the gallery beneath gemstone settings — this is where skin cells and lotion concentrate. Work chain links carefully in both directions.
-
Rinse Thoroughly Under Running Water Make sure no soap residue remains, especially around stone settings. A thin film of soap in a bezel or prong setting will visibly dull the stone's brilliance and is easily overlooked.
-
Dry Completely Before Storing Dry immediately with a soft, lint-free cloth. Do not air-dry silver — water left sitting on the surface causes watermarks and accelerates the tarnishing process. Finish with a brief pass of a polishing cloth to restore shine.
Every AG925 piece is solid, hallmarked 925 sterling silver — made to be worn, cleaned, and passed on. Browse the full collection below.
Browse the Full CollectionMethod 3 — The Aluminium Foil
& Baking Soda Deep Clean
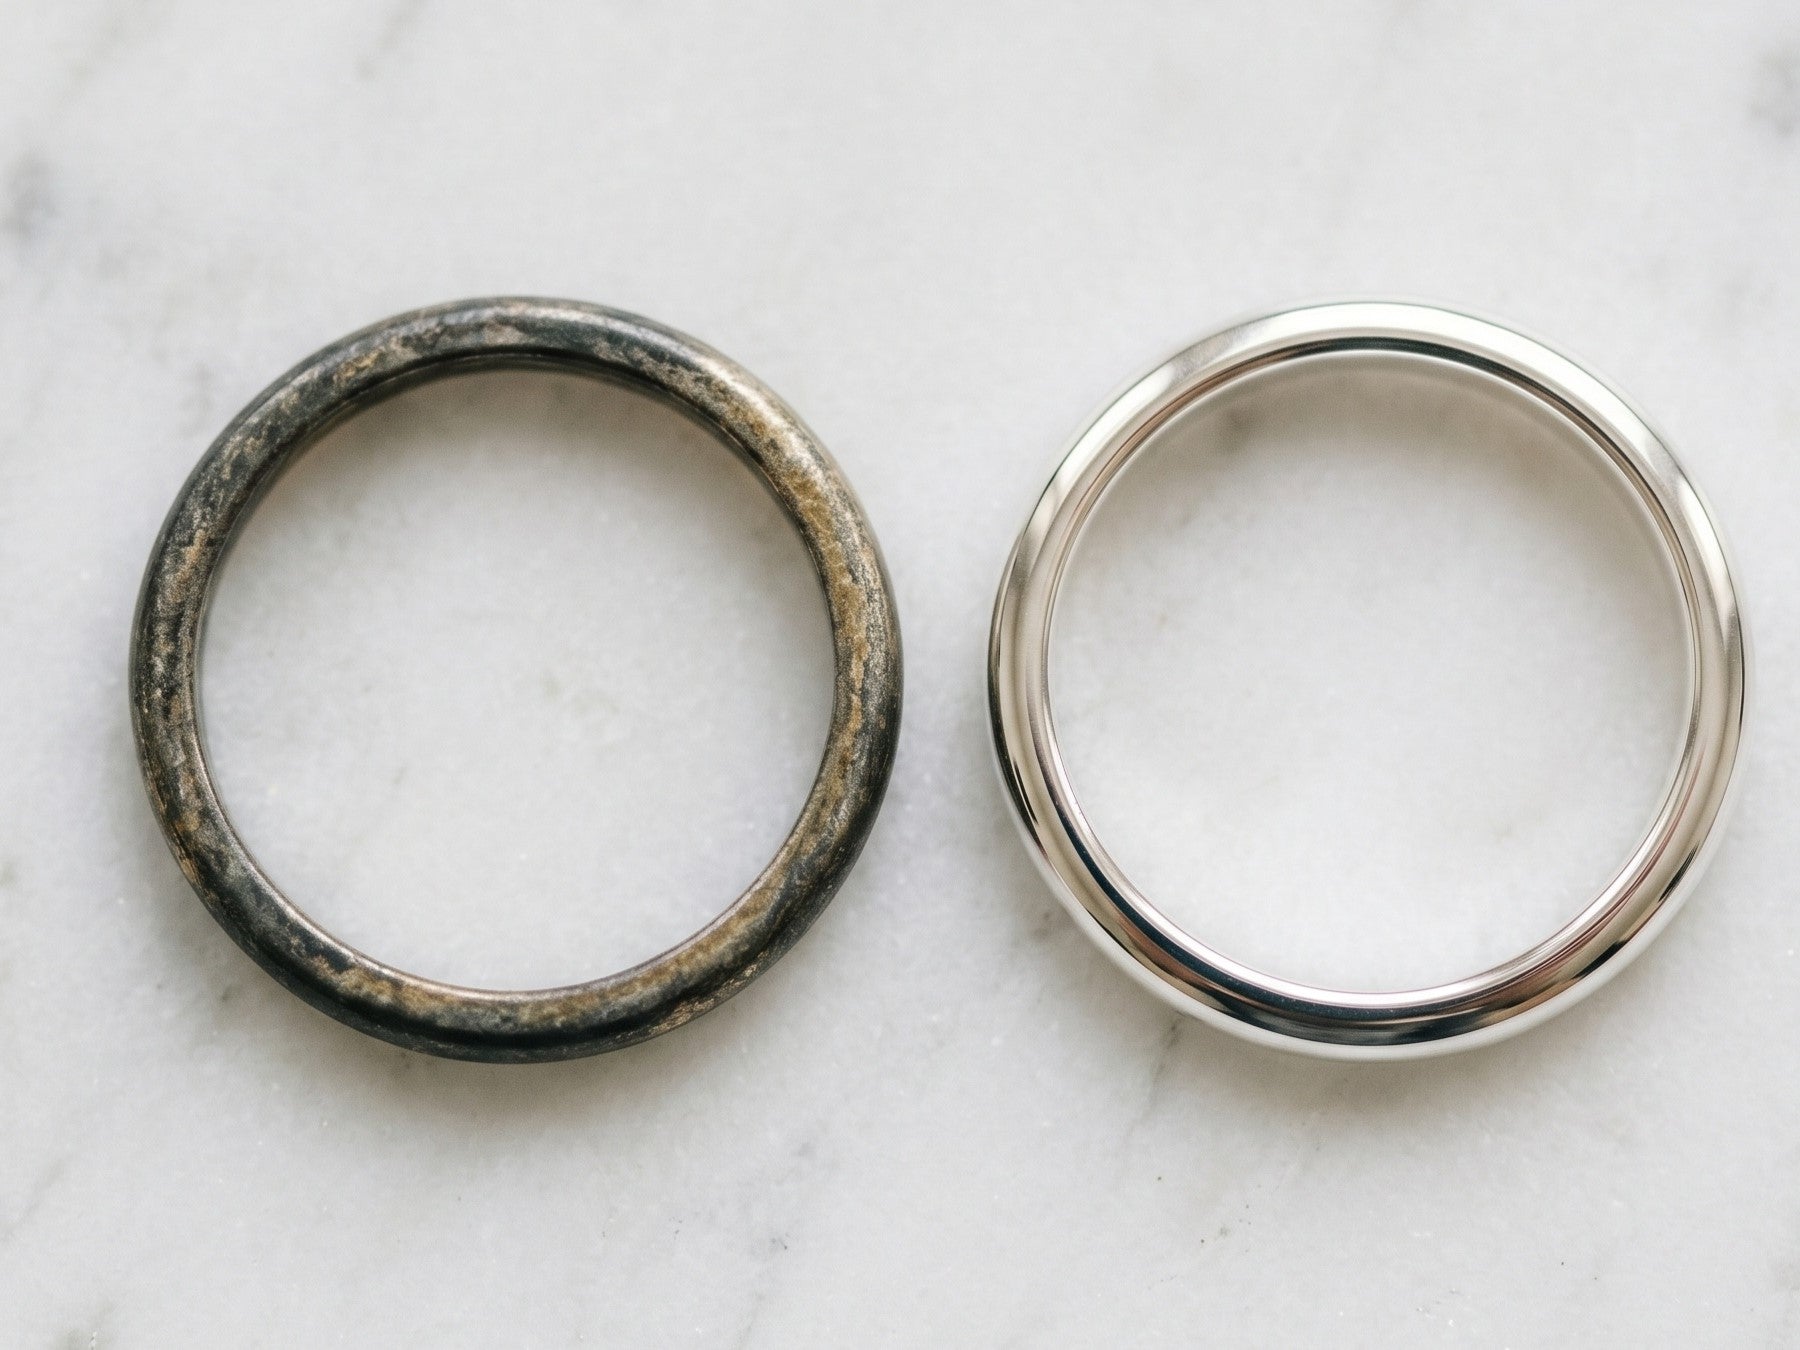
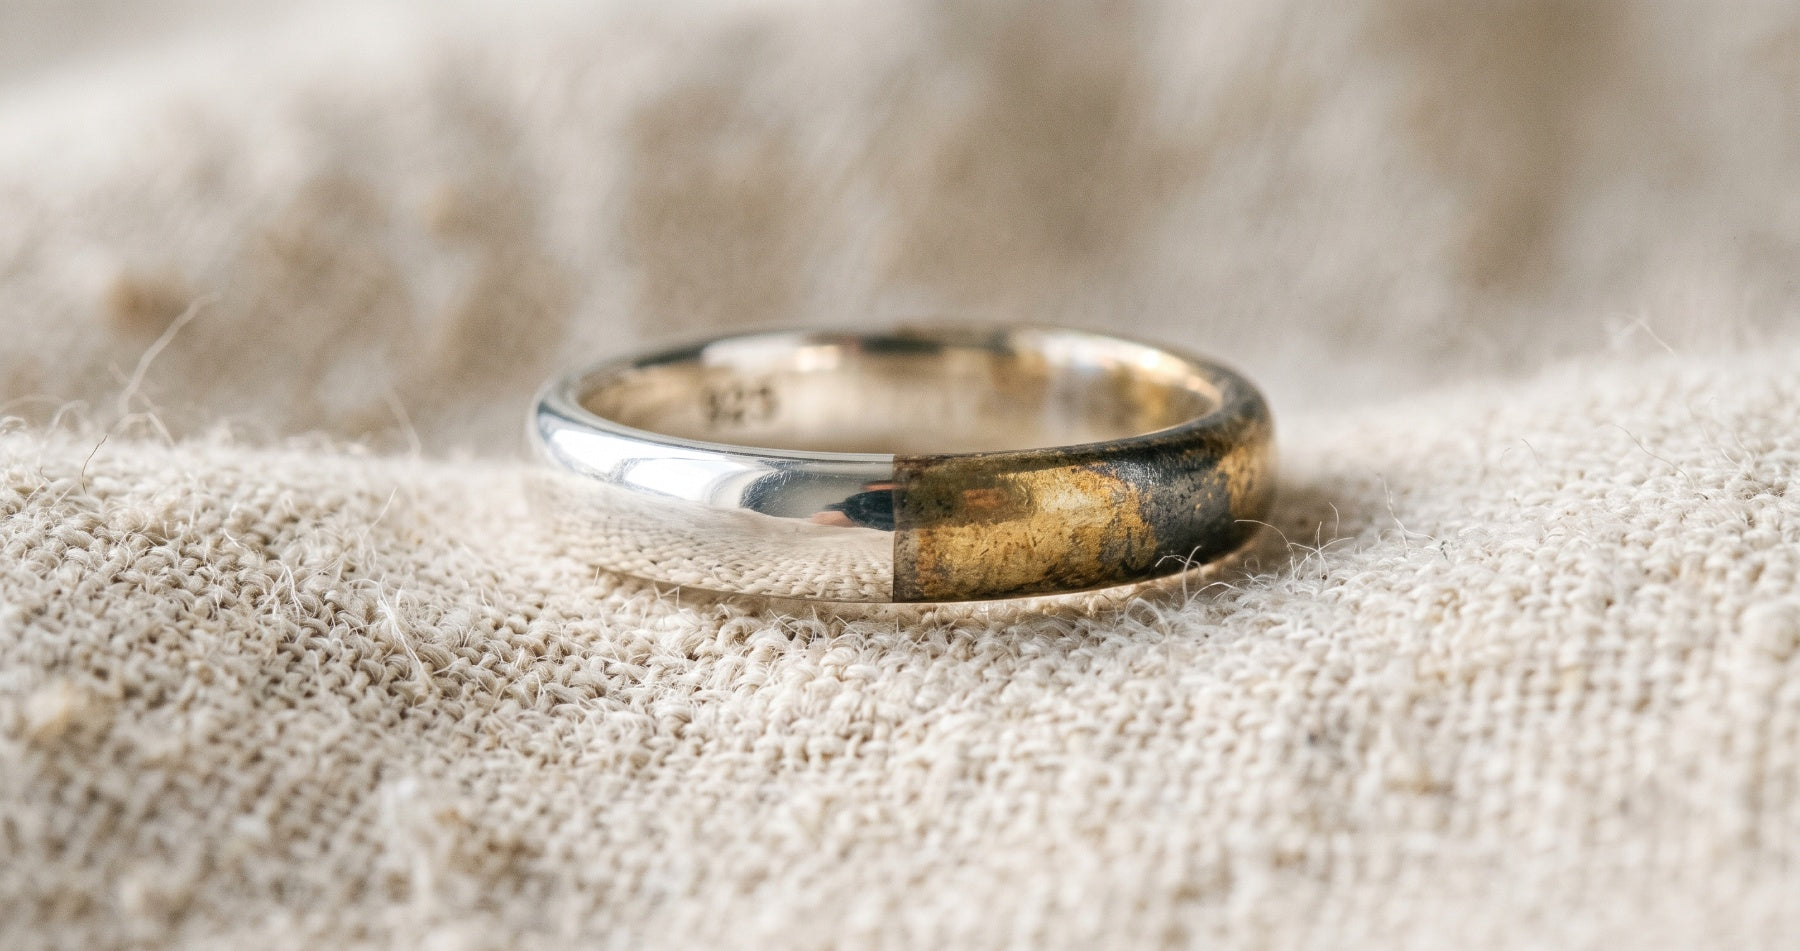
For pieces that have darkened significantly — rings left unworn for months, inherited silver, anything that has gone genuinely dark — this method works through a real electrochemical process called ion exchange. The tarnish (silver sulphide) migrates from the surface of your jewellery to the aluminium foil. The silver is not dissolved or removed — the sulphur compound is. It is why this method feels remarkable the first time you try it: visibly dark silver emerging bright in under five minutes.

The reaction works because aluminium has a greater affinity for sulphur than silver does. In a hot, slightly alkaline solution, the sulphur compound transfers from the silver to the foil. This is why the foil looks darker when you remove the pieces — it is carrying away what was on your jewellery.
Step-by-Step: Foil and Baking Soda Method
-
Line a Bowl with Aluminium Foil, Shiny Side Up Make sure the foil covers the entire base of the bowl. Each silver piece must make direct contact with the foil — the electrochemical reaction requires physical contact between the two metals.
-
Dissolve One Tablespoon Each of Baking Soda and Salt Per Cup of Just-Boiled Water Pour the hot water directly into the bowl over the foil. The solution will fizz slightly — this is the reaction beginning. The salt acts as an electrolyte, improving conductivity and speeding the reaction.
-
Submerge Each Silver Piece Touching the Foil Lay pieces directly on the foil, fully submerged. Leave for three to five minutes. For very heavily tarnished pieces, you may wish to flip them halfway through to ensure even exposure. You should see the tarnish lifting within the first minute.
-
Remove, Rinse Immediately, and Dry Rinse each piece under clean running water and dry thoroughly with a soft cloth. The darkened areas should have lifted visibly. The foil will have taken on a darker, mottled appearance — this is the transferred sulphide.
-
Finish with a Polishing Cloth The foil bath removes tarnish. A polishing cloth restores the surface shine and removes any residual dulling. Use this as the finishing step to bring back the bright mirror finish.
Do not use the foil bath on pieces with gemstones, pearls, or coral — heat and alkalinity can damage porous stones and loosen settings. Do not use it on pieces with intentional oxidised detailing — the dark recesses are design, and the reaction will remove them. For those pieces, use Method 2 on the raised silver areas only.
What to Use — And What to
Never Use on Sterling Silver
Half of proper silver care is knowing what to avoid. Several commonly recommended household methods cause cumulative damage that only becomes visible months later. This table covers every commonly suggested method with an honest assessment of each.
| Method or Product | Verdict | Why |
|---|---|---|
| Silver polishing cloth | ✦ Best daily choice | Gentle compound, safe on all solid sterling including stone-set pieces. No liquid, no residue, no risk. |
| Mild dish soap + warm water | ✦ Safe for almost everything | The go-to for gemstone jewellery and monthly maintenance. Reaches areas a cloth cannot. |
| Baking soda + aluminium foil bath | Good — plain silver only | Genuine electrochemical action. Highly effective on heavy tarnish. Never use on stones, pearls, or oxidised pieces. |
| White vinegar + baking soda | Use with caution | Can work on plain silver but the acidity is hard to control. Never use near stones or pearls — acid etches and dissolves certain minerals. |
| Commercial silver dip solution | Caution — use sparingly | Works fast but is chemically aggressive. Never soak longer than a few seconds, never use on stones or oxidised silver. |
| Toothpaste | ✕ Avoid | Formulated to clean tooth enamel (Mohs hardness 5–6). Silver is much softer. Abrasive particles leave microscopic scratches that accumulate into a visible dull haze over time. |
| Paper towel or tissue | ✕ Avoid | Made from wood fibres. Leaves fine scratches on silver surfaces even though it feels soft. Always use cotton or microfibre. |
| Bleach, ammonia, or household cleaners | ✕ Never | Chemically corrode sterling silver permanently. Even brief contact causes irreversible surface damage. Do not use these near silver jewellery. |
| Rubber bands or plastic wrap for storage | ✕ Never | Both materials release sulphur compounds directly onto silver surfaces. A rubber band left on a silver bangle overnight can leave a permanent dark mark in the shape of the band. |
| Ultrasonic cleaner | Conditional | Safe for plain solid sterling silver. Risky for stone-set pieces — ultrasonic vibration can loosen prong settings and fracture inclusion-prone stones like emeralds, opals, and tanzanite. |
Cleaning Gemstone-Set Sterling Silver
Stone-set pieces need a gentler approach for two reasons: the stones themselves may be sensitive to heat, acidity, or prolonged water exposure, and the settings — prongs, bezels, and channels — can be weakened by aggressive soaking or temperature change. The silver can take it. The stones and settings need protecting.
The rule is straightforward: always drop back to the gentlest method that still cleans effectively. For most pieces, that is warm soapy water and a soft brush.
| Stone Type | Safe Cleaning Method | Avoid |
|---|---|---|
| Amethyst, Garnet, Turquoise | Warm soapy water; soft brush; dry immediately | Prolonged soaking, ultrasonic cleaners |
| Labradorite & Moonstone | Soft damp cloth only; minimal water contact | Chemical solutions, foil bath, soaking of any duration |
| Emerald | Damp cloth with a tiny amount of mild soap; handle with care | Ultrasonic cleaners, heat, harsh chemicals — emeralds have natural inclusions and fracture readily |
| Green Onyx | Soft damp cloth; mild soapy water, dry at once | Prolonged soaking, chemical dips |
| Pearls & Opals | Slightly damp cloth only — no exceptions | Any soaking, any chemical products, any ultrasonic method — both are among the most porous and fragile gemstone materials |
| Oxidised / antiqued silver detail | Polish raised bright areas only with a cloth — do not touch the dark recesses | Dips, foil baths, aggressive polishing — all will lift the intentional oxidised finish |
A note on oxidised silver: The dark areas in oxidised or antiqued pieces are not tarnish — they are part of the design, created deliberately using a chemical process (typically liver of sulphur) and then sealed. Cleaning them away is not reversible at home. Use only a polishing cloth on the raised bright areas, and leave the dark recesses entirely alone.
Shop Green Onyx & Gemstone JewelleryHow Often Should You
Clean Sterling Silver?
The philosophy of silver care is more often, more gently. A thirty-second wipe each week prevents the build-up that forces a deep clean later. And pieces worn daily often tarnish less than unworn ones — the gentle friction of wear and the natural oils of your skin create a subtle protective barrier. The ring sitting in a box is the one that goes dark.
After each wear, give the piece a quick buff with a polishing cloth before storing — thirty seconds that removes the day's perfume and oil residues before they react with the metal. Weekly, do a more thorough pass with the cloth on anything worn regularly to keep the surface bright between deeper cleans. Monthly, give daily-wear pieces a warm soapy wash to reach inside settings, chain links, and engraving a cloth cannot. And only as needed — when tarnish is genuinely heavy — turn to the foil deep clean. It is a rescue tool for neglected pieces, not part of a regular routine.
How to Prevent Tarnish
Before It Starts
The most effective silver care routine is the one that means you rarely need to clean. A small number of daily habits — none of them inconvenient — make a significant difference to how quickly tarnish develops and how much effort it takes when you do clean.

-
Put Jewellery on Last Apply perfume, moisturiser, hairspray, and sunscreen first — then put on your jewellery. These products contain compounds that react with silver on contact. Even a faint residue on your skin transfers to the metal with every wear.
-
Remove Before Water and Heat Take silver off before showering, swimming, washing up, or exercising. Chlorine in pools and salt in seawater are among the most corrosive environments for sterling silver. Hot water and steam both accelerate tarnishing.
-
Store Dry and Sealed Keep each piece in its own anti-tarnish pouch or individual sealed bag, away from humidity. Humidity is one of the primary drivers of tarnish. One anti-tarnish strip in your jewellery box absorbs sulphur compounds from the surrounding air and can extend tarnish-free storage from weeks to months.
-
Never Store Pieces Together Silver scratches silver. Store each piece separately — this prevents both tangling (for chains) and the surface micro-scratches that accumulate into a visible dullness over time.
-
Wear It — Regularly This may be the most counterintuitive tip in silver care: the pieces you wear most stay brightest. Natural skin oils create a gentle protective film. The ring on your finger will tarnish more slowly than the identical ring in your drawer.
When to Take Your Silver
to a Professional Jeweller
Home care handles the vast majority of silver cleaning, and with the methods above it handles almost everything you will encounter. A few situations are worth a jeweller's attention instead:
Loose or damaged settings. If a stone looks even slightly loose — or if you can feel or hear any movement when you gently press it — stop wearing the piece immediately and take it to a jeweller before any cleaning. Soaking and brushing can dislodge a stone that is already on its way out. Setting repairs are straightforward and inexpensive compared to replacing a lost stone.
Antique or inherited silver. Older pieces may have surface finishes, gilding, or enamel work that needs careful professional assessment before any home cleaning method is applied. When in doubt about what you have, ask first.
Very deep tarnish in intricate work. When tarnish has set deeply into fine engraving, filigree, or complex patterning, a professional has access to targeted ultrasonic cleaning, steaming, and precision brushing tools that go further than any home method — with less risk of damage to the surrounding detail.
Professional jewellery cleaning is typically inexpensive, and a good jeweller will also inspect the condition of your settings and stones while they work. Small issues — a worn prong, a slightly loose stone, a stretched chain link — are far less costly to fix early.
Frequently Asked Questions About
Cleaning Sterling Silver
Yes — in the foil-bath method, baking soda dissolved in hot water is safe and highly effective for plain sterling silver with heavy tarnish. The baking soda makes the water slightly alkaline, which is essential for the electrochemical reaction that transfers tarnish from the silver to the foil.
Used as a paste rubbed directly onto metal, however, baking soda is mildly abrasive and can leave fine scratches on bright silver finishes over repeated use. The bath method is the safer approach. Never use either method on pieces with gemstones or pearls.
Toothpaste removes tarnish, but at a cost. Most formulas contain abrasive particles — typically silica or calcium carbonate — formulated for cleaning tooth enamel, which has a Mohs hardness of around 5 to 6. Sterling silver sits at around 2.5 to 3. The abrasives are too aggressive for silver, leaving microscopic scratches that accumulate over time into a visible dull haze. A silver polishing cloth removes tarnish just as effectively, with no abrasion whatsoever.
Fast tarnishing is almost always caused by storage conditions or tarnish accelerators. The most common culprits: high humidity, applying perfume or lotion before putting on jewellery, contact with chlorinated water, and storage in rubber or plastic. Two fixes make the biggest difference: store pieces in individual sealed anti-tarnish pouches, and put your jewellery on last — after your entire beauty routine. If tarnish is returning within days of cleaning, check where and how the pieces are stored between wears.
Almost always, yes. Even very dark, near-black tarnish is still only a surface layer of silver sulphide — the bright silver is underneath, unchanged. The aluminium foil and baking soda method lifts the majority of even extreme tarnish in a single treatment; very stubborn pieces may benefit from a second pass.
Because AG925 jewellery is solid 925 sterling silver all the way through, there is no risk of cleaning through to a base metal. The same bright silver is there whether you are cleaning it for the first time or the hundredth.
Chains respond best to the warm soapy water method. Soak for five minutes to loosen the grime and body oil that concentrates inside links, then work a soft brush along the chain carefully — both along and perpendicular to the links, and particularly at the clasp and jump rings, where tarnish collects most heavily.
Rinse thoroughly and dry completely before storing. For fine, delicate chains, lay them flat to dry rather than hanging — fine chains can tangle and stretch under their own wet weight.
On plain solid sterling silver with no stones, generally yes — ultrasonic cleaners work well for plain silver and are safe at moderate frequencies. On stone-set pieces, use caution. The cavitation vibrations can loosen prong settings over time and can fracture inclusion-prone stones like emeralds, tanzanite, and opals. For any AG925 gemstone jewellery, warm soapy water and a soft brush is the method we recommend.
Not with the methods described in this guide. Solid 925 sterling silver is durable enough to tolerate a lifetime of gentle, regular cleaning. The only real risks are abrasive products like toothpaste and corrosive chemicals like bleach and ammonia — avoid those, and no amount of proper cleaning will meaningfully affect the metal. This is one of the advantages of solid sterling over plated jewellery: there is no plating to wear through.
Prevention is far more effective than cleaning. The single most impactful change is storage: keep each piece in an individual sealed anti-tarnish pouch, away from humidity. Add an anti-tarnish strip to your jewellery box — these inexpensive strips absorb the sulphur compounds that cause tarnish from the surrounding air and can extend tarnish-free storage from weeks to months. Pair this with putting jewellery on last in your routine, after all skincare and perfume, and you will rarely need more than a quick cloth polish to keep everything bright.
Keep Reading —
From the AG925 Journal
Every piece in the AG925 collection is solid, certified 925 sterling silver — hallmarked, hand-set, and made to be worn and cared for over a lifetime. These guides help you understand what you own:

%20%7C%20AG925%0A%0A%0A%0A%0A%0A%0A%0A%0A%0A%0A%0A%0A%0A%0A%0A%0A%0A%20%20%0A%0A%20%20How%20to%20Clean%20Sterling%20Silver%20Jewellery%20at%20Home%0A%20%20The%20complete%20care%20guide%20%E2%80%94%20three%20methods%20for%20every%20l...)
Leave a comment
This site is protected by hCaptcha and the hCaptcha Privacy Policy and Terms of Service apply.